Manage your domain names
1. Access to the management of a domain name
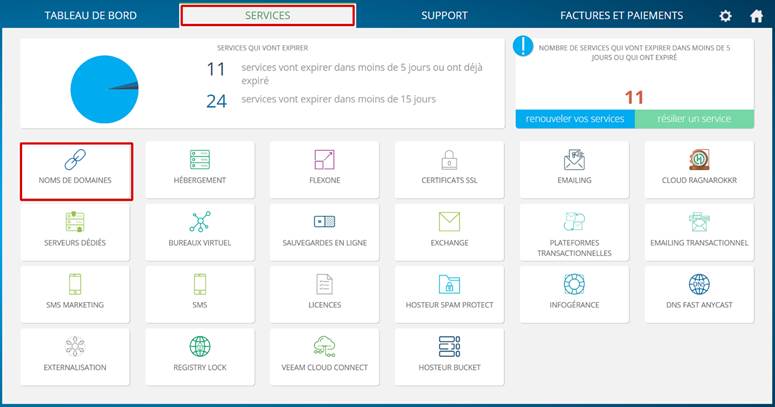
First, log in to your Hosteur account. Once in your Customer Area, go to Services and click on Domain Names.
2. Change the DNS of your domain
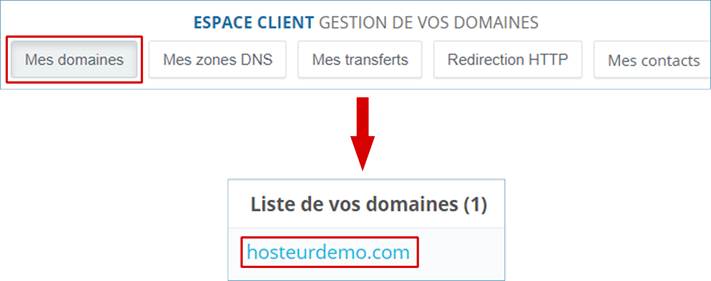
In the My Domains tab, click on the concerned domain in the list of your domains.
Then click on Modify DNS servers.
![]()
Specify the DNS to be set. If your domain name and hosting are with Hosteur, please click on the Use Hosteur DNS button, or enter the following DNS:
- Primary DNS : dns1.hosteur.com
- Secondary DNS : dns2.hosteur.com
Click on Edit when you have entered the DNS.
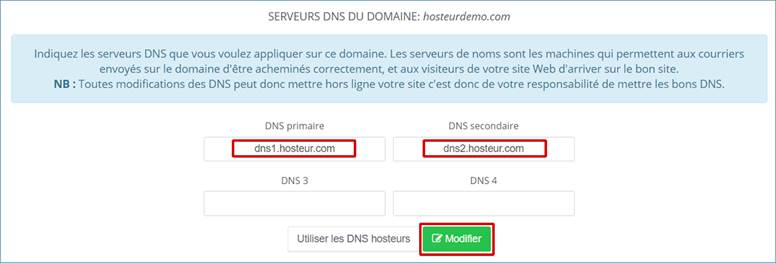
This type of modification is not instantaneous, it will be effective within 24 hours.
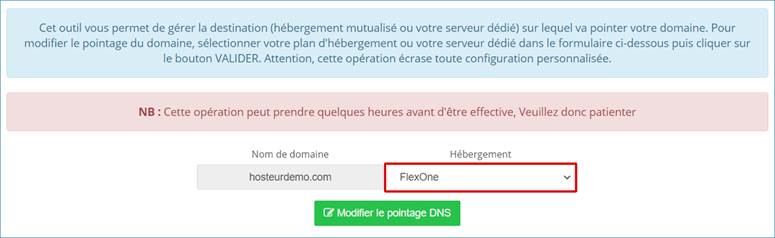
3. Change the pointing of your domain
This consists in automatically modifying the DNS zones so that your domain displays the content of the site hosted on the concerned hosting.
To do this, you need to go to your Manager >> Services >> Domain Names >> My Domains and click on the concerned domain (as explained in the steps above), then on Change DNS Pointing.

Then select in the drop-down list the server on which your site is hosted, and click on the Validate or Modify DNS pointing button.
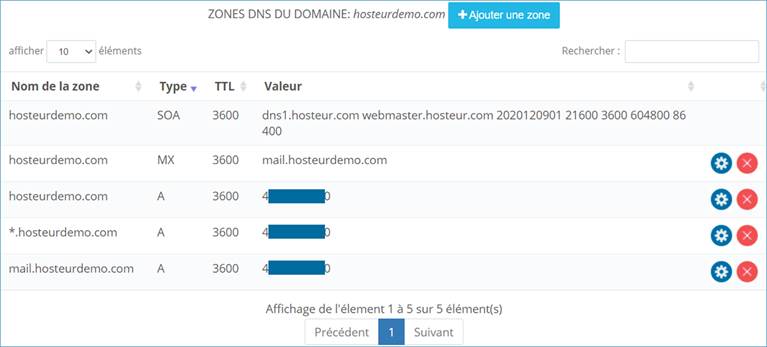
4. Modify your DNS zones manually
You have the possibility via your Customer Area to manage your DNS zones yourself.
This allows you, for example, to point the DNS records concerning the mailbox to a server hosted by us and to point the DNS records of the site to a different server.
To do this, you must click on the domain concerned in your Customer Area, as we did in the previous steps, and then on Modify DNS zones.
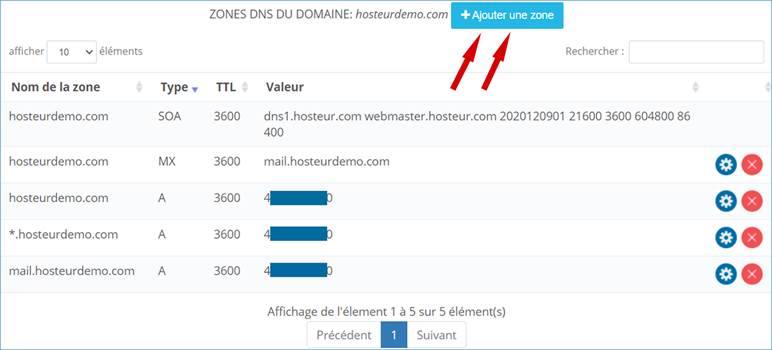
![]()
To make changes, click on the ![]() . To delete a zone, click on
. To delete a zone, click on ![]() .
.
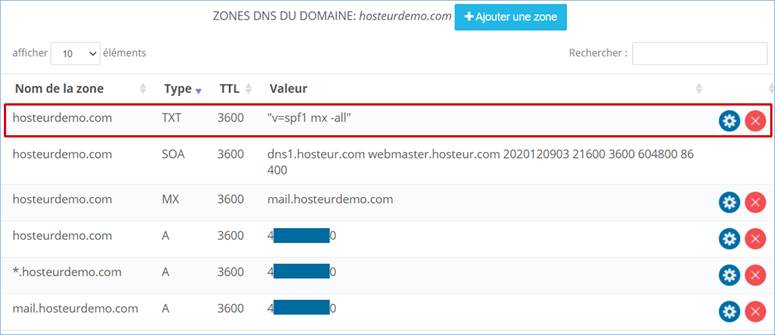
4.1. Add SPF field (sending unwanted emails)
Sometimes you may receive e-mails from non-existent e-mail addresses that are attached to your domain name. In general, this type of mail contains .zip files containing viruses or other malicious programs.
To avoid this, you can add an SPF field ("TXT" type field) to limit these unauthorized mailings.
Just click on Add Zone and fill in the fields.
Exemple :
Zone name: hosteurdemo.com (we could possibly add the SPF field on a sub-domain)
Type of zone : TXT
Value: v=spf1 mx -all
Priority : 0
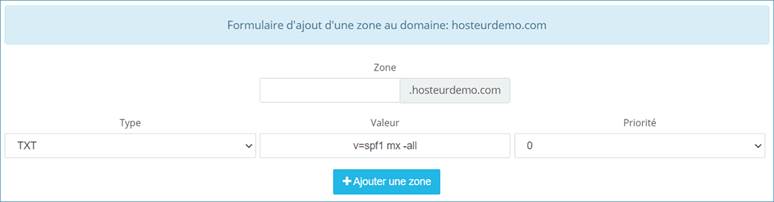
Click on Add Zone, it should now appear in the list of DNS zones for your domain.
5. Domain name Transfer
Before launching a transfer, it is IMPORTANT to make sure that your domain meets the following requirements:
- It must not be expired
- It must have been created more than 60 days ago
- Its expiration date is more than 10 days
Incoming transfer (other host to Hosteur) :
To transfer a domain to Hosteur, you must place the order directly on the site as for a deposit: http://hosteur.com/nom-de-domaine/
You will have the possibility to transfer the domain, you will have to indicate during the order the Auth code of your domain and verify that the domain is unlocked at the previous host.
Outgoing transfer (Host to other host) :
To transfer a domain to another host, you must unlock your domain via your Hosteur Customer Area, retrieve the auth code and order a transfer to the new host.
5.1. Get your Auth Code (EPP Code or Authorization Code)
Each domain has its own Auth Code allowing to transfer the domain to another registrar.
To get the Auth Code of your domain, you must go to your Customer Area >> Services >> Domain names >> My domains.
Click on the concerned domain and then on Get Auth code.
![]()
Note: for .be or .eu domain extensions, please contact our technical support by ticket via your Customer Area, section "Support".
5.2. Unlock your domain name
Some domain extensions are locked and must be unlocked before being transferred to another host (for .fr and .be domains only the Auth Code is sufficient).
To unlock your domain, go to your Customer Area >> Services >> Domain Names >> My Domains.
Click on the corresponding domain and then on Unlock Domain.

Your domain can then be transferred to another registrar.
6. Create a redirect without a hosting plan
You must navigate in your Customer Area >> Services >> Domain names >> http redirection.
Select the domain to be redirected in the "Domain name" drop-down list.
Enter the destination URL (with http://www. in front) in the "Redirected to" field.
Check the option "Point my ip to the redirection server" and click on Add redirection.
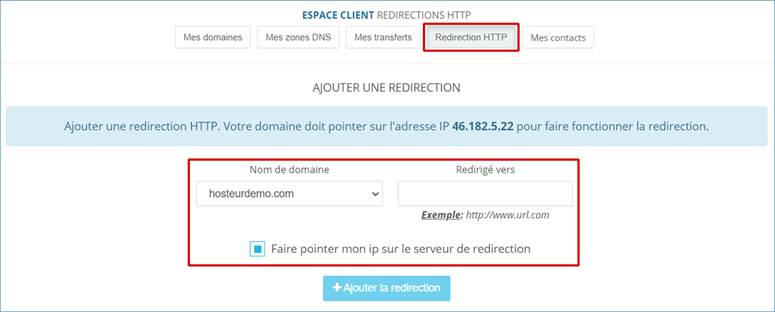
Wait a few hours and the redirection will be effective.
7. Delete a domain
To delete a domain, there are 2 possible solutions:
- Either check that the domain is in manual renewal and let the domain expire. It will fall into redemption period after the expiration date and will be deleted automatically after one month after the redemption period;
- Either contact our technical support by ticket from the customer account that owns the domain and make the request, we will then remove the domain immediately from the account.
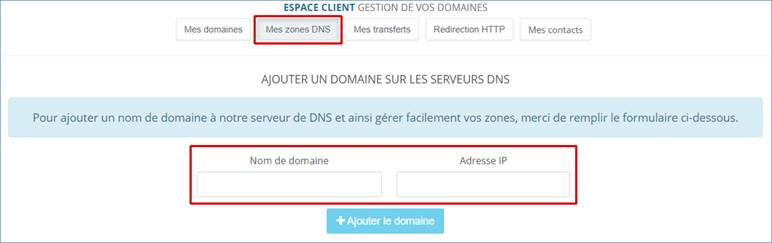
8. Add a domain in the zone management
This allows you to create the zone on our DNS servers to allow you to manage the DNS zones (A, MX, TXT, CNAME, etc.) of your domain directly from your Hosteur Customer Area.
You must have set our DNS for your domain (dns1.hosteur.com and dns2.hosteur.com), whether the domain is at Hosteur or not, otherwise everything you do in this zone management at Hosteur will not be taken into account.
Note : if you use external DNS, the records will be managed by the corresponding host.
To do this, follow these instructions:
1- Go to your Customer Area >> Services >> Domain Names >> My DNS zones
2- Enter the domain name and IP address of the server
3- Click on the Add Domain button